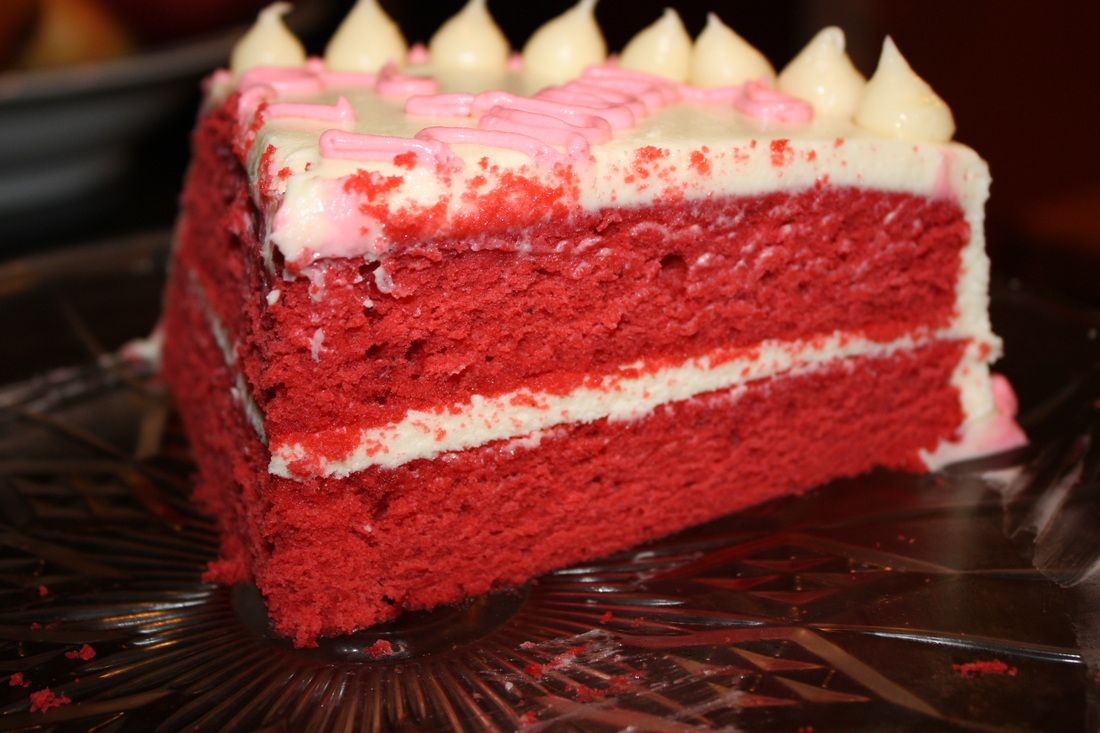
So yesterday was my birthday, but today is my birthday celebration/party. Every year for everyone's birthday, we invite our cousins over to have dinner with them and celebrate that way. It's really fun and I've been looking forward to it all week. The best part, though, is that my mom finally agreed to letting me bake my own birthday cake, and man did I have a blast. I tried to make it the most spectacular of cakes that I've made. The red velvet is soooo good, and believe me because I've been searching for a really good red velvet cake recipe for a while, and this one's definitely a keeper. Red velvet is almost always paired with cream cheese frosting, but if you're not a fan of that (which then I would consider you to be crazy, sorry), you can pretty much use any other frosting you want on top. But just believe me, use this cream cheese frosting, it's awesome. Plus if you look up recipes for red velvet cake, they're always paired with cream cheese frosting, always. They just go really well together. So, happy birthday to me, and I hope you enjoy the recipe!
0 Comments
Today I had some extra time on my hands, and I've been dying to play around with yeast recipes ever since I learned all about how to work with it at my Baking Class this week, so I decided to make Monkey Bread. It's a fairly simple recipe and a great one to start out with if you're new to using yeast. The worst part is of course, the waiting. Just so you know before you start the recipe, you will need to wait a total of about 2 hours for your dough to rise throughout the recipe, meaning you need 3 hours to make this. However, the final product looks really professional and just wicked cool, and you don't need to be really good at making it for it to come out like that, all you have to do is wait for the yeast to do its trick! So cool!
Today is my birthday! A special day calls for some special breakfast, so I made doughnuts! I got the recipe from one of the many blogs I follow, called Averie Cooks. I always assume that whatever the baked good looks like in the picture, mine will probably look a little less pretty, since I'm no professional and I'm usually only making my goods for me or my family. However, these came out so beautiful! They looked exactly like they do in the pictures she had up on her blog! I highly recommend using a Ziploc bag to pipe the batter into the doughnut pan. It gives a better finished product. A pastry bag isn't really necessary (although you could also do that, I just didn't want to waste one), and a spoon doesn't really do the trick. They're also really quick, which is great for me because I was dying to have one right when I woke up, and I only had to wait 30 minutes or so. Enjoy!
Today was day 4 of my Cambridge School of Culinary Arts Baking Class! It was so much fun! Today was cupcakes and cakes day, which is perfect for me because tomorrow is my birthday! They gave us plenty of really great recipes to choose from, making my decision even more difficult, but I settled for Coconut Cupcakes, since I've always wanted to make them and never seem to have coconut in my house.
These are absolutely delicious! You may have already guessed they would be so judging by the fact that they use a total of 5 sticks of butter, but hey, they're not supposed to be healthy, right? If you are wondering how to toast coconut, simply lay out your coconut on a half sheet pan lined with parchment paper and put it in a low temperature oven (say around 250 degrees) for 5 minutes or so. But keep an eye on them, because depending on how hot your oven really is, they can toast very easily and you don't want to burn them. For the garnish, it says you can either sprinkle with coconut or dip the tops in coconut. I suggest dipping the tops in coconut because the coconut stays on more easily and you get more coconut per cupcake, which is always a plus. Anyways, it is a pretty simple recipe and doesn't take too much time, just make sure you wait long enough for your cupcakes to cool before frosting them or else the frosting will melt. You can even stick them in the fridge to speed things up if you'd like. Enjoy! I made these cookies right after I made my Maple Butter Cupcakes, in which you need 6 egg yolks, so since I felt bad throwing out 6 perfectly good egg whites, I made these! They are very good, and a little chewy, so if you're not a fan of that these may not be for you. They're also really fun to make because you can try out basically any flavor you want and you get to pipe them, which I love. I used vanilla extract, creamy hazelnut flavor, and imitation maple flavoring for mine. I liked the vanilla and hazelnut the best and would definitely recommend those. You can also try using cocoa if you would like for chocolate meringues. Enjoy!
Recently, my mom went to Denver to visit a friend, and her friend was nice enough to allow my mom to come home with probably the best surprise present anyone could ever come home with, a new cookbook! It's called The Cake Bible, and it's just about the coolest thing ever. I flipped through the entire book and this recipe caught my eye. Maple? In a cupcake? Sounds awesome. So, as I usually do when I feel like celebrating, I baked today when I got home from my last final of junior year! Now to the recipe.
This cupcake is absolutely delicious! It is honestly the best cupcake I have ever had in the world. And, it makes your whole house smell like pancakes after they've baked. And even now, 3 days after making them, I still walk into the kitchen and can distinctly smell a maple scent. You can also make two cake layers with this recipe, you just have to adjust the baking time (which I gave the adjustments for below). To give it the maple flavor, you use maple sugar instead of regular sugar and add extra maple flavoring. I found maple sugar in Whole Foods if you're trying hard to find it, or if you don't have one of those around I'm sure you can find it somewhere else. To frost the cupcake, I simply used my very favorite buttercream frosting recipe and added half the amount of maple flavoring instead of the vanilla, and it worked wonderfully! If you would like, you can top the cupcakes with chopped walnuts as well. Enjoy! This Sunday is Father's Day and I never really know what to get my dad. Father's Day is one of those holidays that you're really supposed to give heartwarming, thoughtful gifts, and I can never think of what to get him. But this year will be different, because my dad LOVES fudge. Anytime my mom goes somewhere without my dad and sees a store that sells fudge, she always stops by to get him some, and he always eats it all up in a day. So the other day I tried to super discreetly ask him if he could have any flavored fudge in the world right now, what flavor would he ask for, and he said chocolate. Classic. It's kind of his style. No nuts or anything? Nope, just chocolate. So that's my dad's Father's Day present this year, and let me tell you, it's gonna rock.
Now to get to the actual recipe. Notice how I specifically put the word "foolproof" in the title of the recipe. It's because as long as you have sweetened condensed milk in your cupboard, anyone can make this recipe, it's super duper easy. All you do is melt together the sweetened condensed milk with chocolate chips, a dash of salt, vanilla extract, and any add-ins of your choice. Then you refrigerate and cut into squares and you're done! So simple, yet so delicious and decadent. And I was originally worried it may just taste like a hardened block of semisweet chocolate, but believe me, it doesn't! It really has that stereotypical fudge flavor that is just to die for. Enjoy! If you read this blog a lot, you know that I LOVE peanut butter. This recipe takes my love even one step further by adding Nutella. They're so good!! All you do is make a peanut butter cookie dough and swirl in a quarter cup of Nutella with a butter knife, which at first looked like it was going to be a hard job, but it's really not. The hardest part of this recipe is waiting while one of the best cookie dough's ever sits in your fridge to chill.
These cookies are not only extremely yummy, but so cute and pretty. I mean, just look at them. They look so Martha-Stewart-y (which is not at all ironic if you look below to see where I got the recipe from). They remind me a bit of those shortbread cookies with chocolate filling in the center from Traders Joe's, and if anyone reading this knows what cookies I'm talking about, you'll go grab your ingredients right away. The cookie only has 5 ingredients to it and it's still so yummy!
|
AuthorMy name is Katherine and I love, love, love to bake! You can find all my baking adventures on this blog, plus you can follow me on Social Media by clicking below! Archives
January 2016
Categories
All
|